


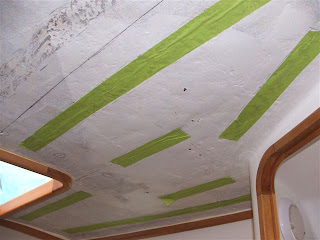
 I have taken a few snaps to show the process involved in attaching the headliner, as that seems to be all I've managed to do lately. The first step is to survey the deckhead and decide where the velcro needs to go. I have had to allow for lots of bumps, remember to allow for wrapping the vinyl-backed foam around the edges of the sheet, and work out how much you need to hold it all up. I use 2" masking tape to get a good visual, then mark around the edges and measure it all.
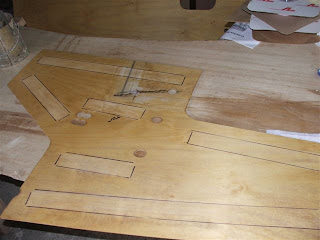 Next the hook side tape is stuck on to 2" ply strips, stapled and the staples bent over to ensure everything stays together. Then these strips are used to mark the position on the headliner ply, which is then given a sand to key up for the loop velcro.
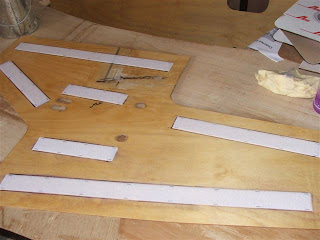

 Bill has been working away at creating the hard top for the dodger. First he made a former out of MDF, then the foam was bent over that and glued together. Two layers of 20mm foam will give us a top that will be thick enough to recess some LED lights into, mount 2 GPS aerials on, and be strong enough to walk on. At some time in the future I might add solar panels so we have added sufficient conduit for that as well.
 In the last couple of days we have routed out the foam to allow us to glue in the plastic track for the zip-off clears. These will have a surround of some vinyl product, running through the track at the top and clipped down on the bottom. Stainless steel legs will keep it up, hopefully!
 Also nearing completion is the headliner for the saloon and aft cabin. Way back we tested our headliner concept in the forepeak, now we are working through and doing the rest of the boat. I just sealed all the liners this afternoon and the next part of the process, gluing the plywood strips to the deckhead, should be pretty close. I've also nearly finished re-varnishing the interior and I just have a bit around the galley to do.
 We decided to lose the piano hinge on the back of the cockpit lockers, in place of more robust (and shiny) chromed hinges on the top of the locker lids. To do this neatly Bill has filled in the watertrap area outboard of the lockers. This will now get glassed over and will be nice and strong. It should also channel water down the gutters on the sides of the lids and keep that area drier - time will tell!
 Forgive me Colin for I have sinned, it's been a month since my last blog.... Hopefully I will be forgiven by those who follow the blog and eagerly await the next installment of the Weta saga. I would love to think that there are not too many blogs left to go until completion, reality has a way of asserting itself though. Anyway, enough of the rambling introspection, lets look at progress. I have been re-varnishing the interior trims, a slow job with a small brush. That should give us at least 5 coats, probably more. I have been able to put things in place for the final(ish) time, this shows the view down the walkway.
 Outside we have been busy with a host of little details and the most recent visible result is the addition of a teak rub rail on the gunwhale. We have only done 25% but I think it will look good, giving us something that will look fair around that part of the boat.
 We have also been working on the cockpit teak, plugging holes and sanding. We removed the teak planking overlay at the forward end, this has had a fibreglass backing added and all the holes plugged. The underlying deck has had all the remaining screws removed and has been faired in preparation for the gluing down of the teak. What a mess, the entire cockpit molding is a very poor job. Bill, who has a lot of experience in these things, can see what went wrong and how they bodged it to make it look semi-decent. The only part we haven't faired is the outside of the port coaming, which still has a big bow in it.
 Bill prepped the cockpit hatches and I have used Uroxsys to varnish a primer and 1 top coat. It looks fabulous and will improve once I sand the dust off and do the recommended 6 coats - fortunately you can add another coat after about 2 hours so it will only be a couple of days total.
