I have been spending a lot of time in the cockpit recently. Unfortunately, not as most Peterson owners spend time in their cockpits - reading, sailing, socialising, sleeping. No, I have been sanding and painting - crawling, crouching, kneeling and bending. And the worst thing - it isn't finished yet. Close, but by no means close enough. One of the biggest things I have been dealing with lately is the weather. After 3 years my home-made cover is showing very distinct signs of wear, mainly by leaking, you guessed it, right into the cockpit. So now we have covered the entire deck and coachroof in plastic to protect it from overspray, access to inside the boat is not possible and if the weather is wet and windy, progress comes to a halt. Autumn in Auckland is not particularly dry either so progress has been very slow. Winter dries out a bit so hope springs eternal (great unintended weather reference there...!).

We have managed 4 coats of Interprotect and 2 coats of YRA600 so the end is in sight. 2 coats of Interspray 9000 and we are all done. The cockpit floor can go down finally and stuff can be finished! I have been busy otherwise bolting stuff on permanently. This is the genoa turning block which is through-bolted on the bulwark. If it doesn't end up being strong enough I do hope no one is in the way!
Most of the plumbing is finished, I have used John Guest and now have an extensive collection of new incorrect fittings to add to my plumbing collection... I have a few more bits to do as soon as the deck plastic is removed.
We have also been busy on the stainless front, this shows the new bow cap and forestay fitting. The lip on the top of the bow cap sits on top of the bulwark and has yet to have the anchor roller fittings located on it. They will be removable in case of damage. The new forestay fitting is slightly more contemporary than the old one, which showed cracks and corrosion after I had it electro-polished. I feel you need some confidence in this area! The tie-rod from the bow cap to the forestay is now a 16mm solid rod, removable for inspection. The lump visible right at the front of the bow cap is the plug that the pulpit will fit onto.

The chainplates have also been fitted, this shows the external view with the covering plate screwed down. I chamfered a "V" into the fiberglass plate that is glued to the deck, as well as the 5mm cover plate. This allowed me to get a good bead of sealant into that join. I am hoping never to see any water around this area, although when we tighten the mast down I might need to reseal, depending on how much the chainplates move when the strain comes on. Resealing them is only a matter of removing the 2 cover screws and it is all there.
I fitted carpet below, instantly transforming the boat to look considerably more finished than it did. It feels and sounds much better as well.


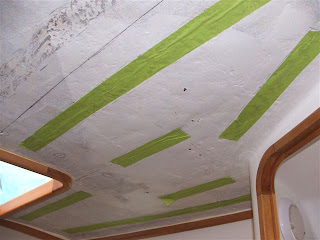 I have taken a few snaps to show the process involved in attaching the headliner, as that seems to be all I've managed to do lately. The first step is to survey the deckhead and decide where the velcro needs to go. I have had to allow for lots of bumps, remember to allow for wrapping the vinyl-backed foam around the edges of the sheet, and work out how much you need to hold it all up. I use 2" masking tape to get a good visual, then mark around the edges and measure it all.
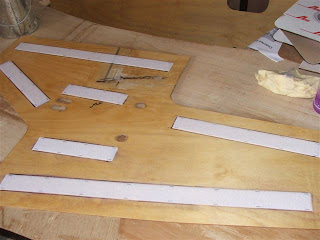
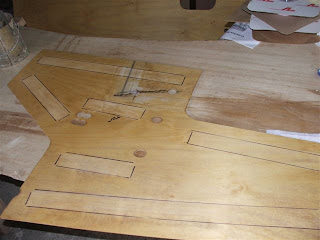 Next the hook side tape is stuck on to 2" ply strips, stapled and the staples bent over to ensure everything stays together. Then these strips are used to mark the position on the headliner ply, which is then given a sand to key up for the loop velcro.